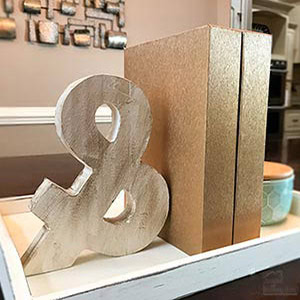
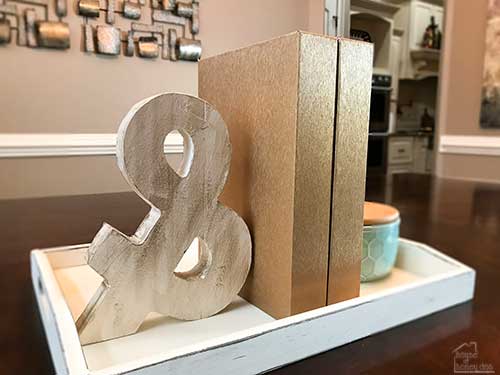
Stop! Don’t throw those old boxes away! You might be able to make some beautiful and useful storage out of them. Yeah, I know you may be thinking that there is no way to make an old box look like a “quality” piece, but before you make up your mind, you have got to see how I cover boxes by with contact paper. To demonstrate, I thought I would share my brushed brass storage boxes.
This post may contain affiliate links. (*) If you make a purchase using my links, I may receive a small commission. Please feel free to check out my full disclosure for more details.
Getting a High-Quality Finish
The greatest thing about recycling boxes, aside from the fact that you get a custom design, is the amount of money that you can save. For the price that you would spend to purchase one box, you could purchase enough contact paper to make a dozen!
Now, I know we have both seen our fair share of upcycled items that, to be quite frank, look like any five year old could have done a better job. But occasionally they turn out pretty spectacular.
The trick to getting a piece worthy of showing off is all in the materials and the technique. Take my lampshade makeovers, for example. A good technique and a small piece of the right fabric is all it takes to make a showpiece.
Recycling boxes are no different. If you use quality materials or contact paper, and you have the proper technique, those boxes can become worthy of a prized spot on your bookshelf.
I am particularly fond of metallics and am adding some brass accents to my home office. This brushed brass contact paper* was perfect for making some inexpensive pieces.
I should point out that it is quite thick, which may or may not be a plus to you. The quality is so nice that it would make a perfect paper for covering furniture or appliances and would hold up well to wear-and-tear.
The Best Boxes to Use
The first trick to getting a high-quality finish is to choose high-quality boxes. Some cardboard boxes have a natural wave to the surface. I suggest that you avoid those unless you have a thick contact paper because they don’t produce smooth results.
In addition, if it has been bent, dented, or damaged in any way skip it. Those imperfections will likely show up under the contact paper. Save those boxes for something more substantial, like covering them in twine.
For the best results, you want boxes that are smooth and damage-free. Smooth surfaces are easier to cover and will release the adhesive better if you make a mistake and need to reposition it. They also will look more professional when finished.
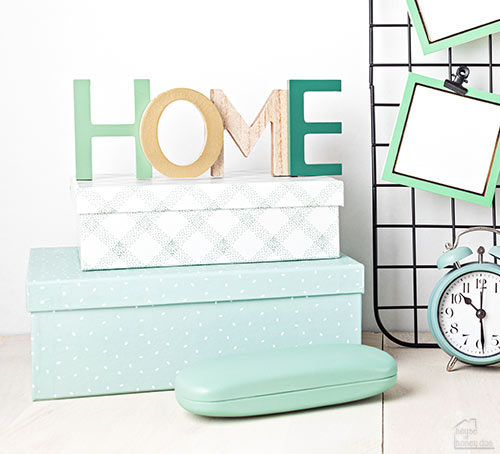
Look for boxes that are not too flimsy and have a hard shiny surface. Some shoe boxes work very well for this. I like to go for coordinating colors combined with stackable sizes for my shoe boxes. (see above)
I am especially fond of Apple’s brand boxes. I never throw away an iPad or an iPhone box. They are incredibly strong and smooth. Plus, it cost me quite a bit to purchase what came inside them. So, I might as well get as much from it as I can.
The Best Contact Paper
Thickness:
In addition to quality boxes, you want to look for quality contact paper. I have found that some contact paper is so thin that it doesn’t make good material for covering anything other than the bottom of a drawer or cabinet shelf.
Unfortunately, most contact papers do not state their thickness. It is more of a trial and error process. But, I have tried so many brands over the years that I have discovered some of the best. If you are looking for a good place to start, you can take a look at my influencer page on Amazon.* I have saved a lot of my favorite contact papers for others to see.
Width:
Always buy your contact paper wider than the surface that you want to cover. That way, you do not have to worry about matching seams. The only time seam alignment works out well is when covering a flat surface, like I did with my faux reclaimed desktop.
Features:
There are two other things that I look for in a good contact paper: gridlines and stickiness. Gridlines are important to get accurate cuts. However, if a paper doesn’t have gridlines, you can still use it. But, you will need to put in a bit of extra effort to get things square.
I also like a paper that has a strong adhesive. I like to be able to pull it loose if I need to, but I also want it to hold strong. Otherwise, it will be prone to lifting at edges and overlap areas.
Some people complain about too much adhesive power, but this is usually because the material being covered doesn’t match with the strength of the paper.
This is another reason why smooth boxes work better for covering. A rougher surface will not release the material as well and can actually tear if you try to reposition it.
Other Tools Needed

To get the best results from your projects, you will need a few other supplies. First and foremost, you will need a very sharp cutting device. I prefer to use an X-Acto knife* for contact paper work.
It cuts a nice clean line against even the tightest seams. You can also use a utility knife if you prefer. However, you may find that you will be more accurate with the X-Acto knife.
You will also need a straight edge to use as a cutting guide. I love my stainless steel ruler* because it has a cork backing that protects surfaces from scratches. It also provides a very crisp edge when turned upside down.
I have used it to score and tear straight lines in paper, and for measuring and cutting a slew of different materials. The only negative is that the beginning and ending numbers are inset just a bit. But, it makes the most beautiful scores and creases, so I can live with that.
I also recommend using a cutting mat to avoid damaging your table or work surface. If you do a lot of crafting or quilt work, you likely already have one.
But, if you are looking for a good cutting mat,* keep in mind that you will want something large enough to allow long continuous cuts. A minimum of 18×24 inches would be a good place to start. Go larger if you can afford to.
Finally, you will need something to smooth out the air bubbles. On small surfaces, I just use an old credit card. However, I also have a smoothing tool* which I find necessary for larger projects and/or wallpaper.
How to Cover Boxes with Contact Paper
Now that we have covered all of the essentials on contact paper, let’s jump right into how to cover boxes with contact paper. The video above is added for clarification because if a picture is worth a thousand words…
However, the instructions below have some important details that aren’t shown in the clip. The full video can be found on my Youtube channel for anyone needing to see the entire process. FYI – you can see that this video was made for our home improvement site, Queen Bee of Honey Dos, but we decided it was a much better fit with our crafting audience.
Step 1
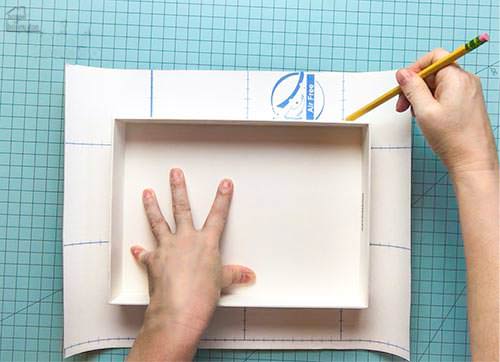
After measuring your box (make sure to include the sides), add approximately 1″ to both the length and width. This will give you 1/2″ of paper to fold over each interior side. Use your blade and straight edge to cut out the section.
Next, lay your box perfectly in the center of the contact paper section and trace around it. Use the grid marks to help center the box so that there are equal amounts on each side.
Step 2
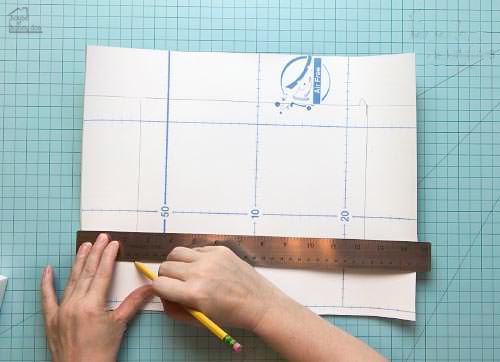
Using your straight edge, extend the marks from the long side of the box all the way to the ends of the contact paper. Note – just do this along the long sides.
Step 3

Using your straight edge and X-Acto knife, cut the marks that you just made in step 4.
Step 5
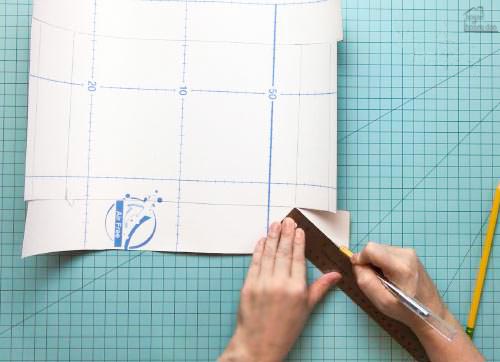
Next, place your straight edge at the interior of your cuts and turn it until it aligns with the outer corner.
Cut along this line. This will remove a triangular-shaped piece that has approximately a 45-degree angle.
Repeat for all corners.
Step 6

Now, remove another small triangular piece from the four corners. You can use a standard ruler to cover the portion that you are keeping and to get a straight cut.
Step 7
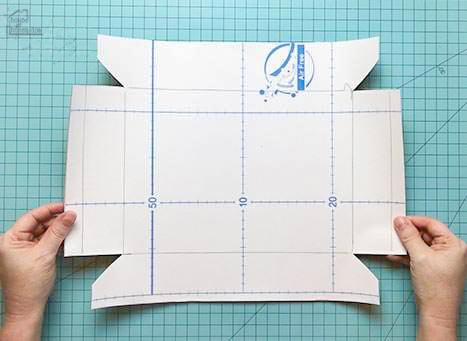
After you finish cutting out your cover, it should look like the one above.
Remove the backing and place the box so that it aligns with the tips of the interior cut marks made previously. Smooth out any air bubble with your tool or card.
Step 8
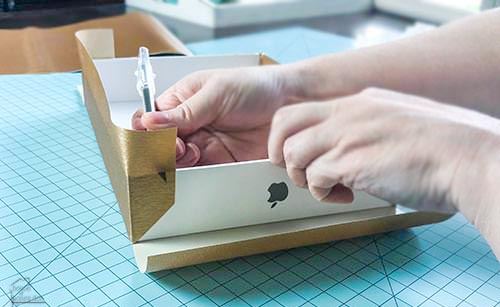
Fold one long side up and smooth with the tool. Pay special attention to the edges, pressing firmly. Trim the contact paper so that it is flush along the adjacent sides of the box.
Step 9
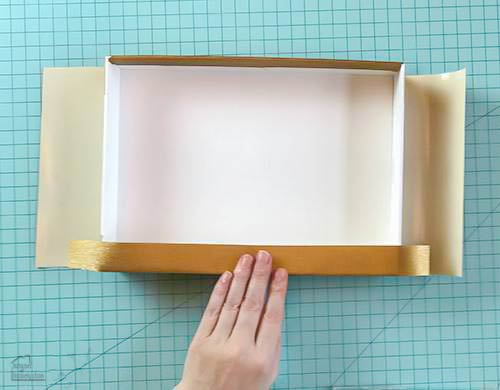
Fold over the top edge But do not press down into the interior of the box just yet. First, remove the flaps that hang over the adjacent sides by cutting along the interior edge.
Step 10
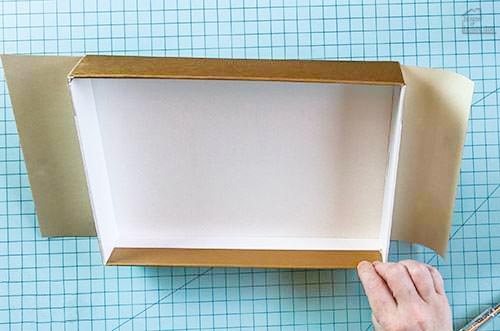
After removing the flap, fold the section over and smooth down. Repeat for the opposite side. Then, fold the remaining sections up and over.
Final Comments
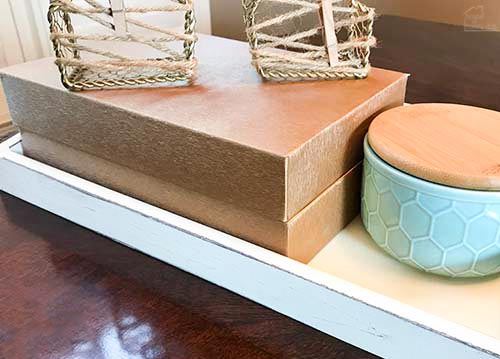
If you are covering a box that has a lid, repeat the same process for the top. For more variety, try using a solid color for the box and choose a coordinating paper to cover the lid.